
More than 1 million Americans now live in tiny homes or mobile dwellings, yet traditional power grids still serve as their primary energy source. This statistic reveals a significant gap in the sustainable living movement. Tiny home dwellers and mobile living enthusiasts increasingly seek energy independence through off-grid solar power and other renewable systems.
The shift toward minimalist lifestyles has created a perfect opportunity for tiny home DIY renewable energy projects. People living in compact spaces require less total power than traditional households. This reality makes renewable energy systems not just practical, but also more affordable for small-scale living situations.
Sustainable living goes beyond environmental responsibility. It opens doors to true location independence and financial freedom. When you build your own power infrastructure, you escape rising utility costs and gain control over your energy future.
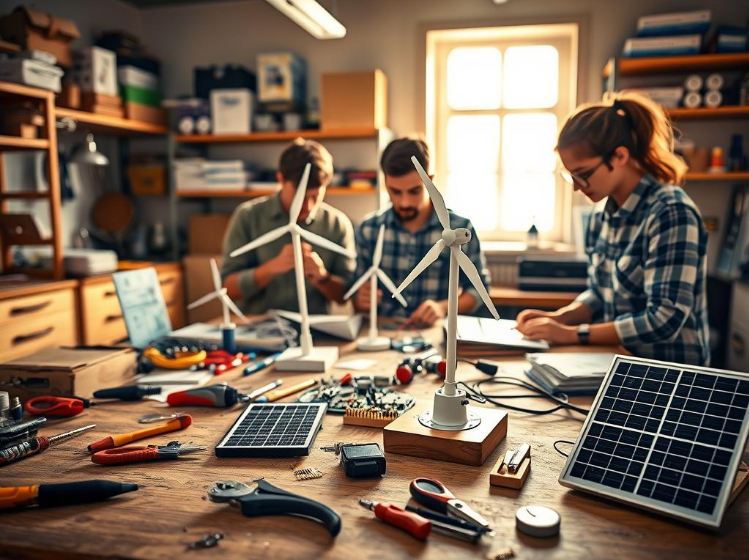
This article walks you through everything needed to create a complete renewable energy system for tiny homes and mobile structures. You will learn how to calculate your specific energy needs. You will discover the best solar, wind, and hydroelectric options for your space. You will understand battery storage and power management systems.
Real examples from across the United States show that these projects work. Homeowners in Colorado, Texas, and Florida successfully generate their own electricity using DIY renewable energy setups. These are not complicated engineering projects. Most people with basic technical skills can complete these installations themselves.
Whether you live in an RV, a tiny house on wheels, or a stationary small home, energy independence is within reach. Let’s explore how to build the power system that matches your lifestyle and budget.
Understanding Energy Needs in Compact Living Spaces
Before you invest in solar panels, wind turbines, or battery systems, you need to know exactly how much power your tiny home requires. This foundational step prevents costly mistakes like buying equipment that is too small or too large for your actual needs. Understanding your energy consumption is the smartest way to design a renewable energy system that works reliably without wasting money.
The process starts with honest assessment. You should map out every device you use, check its power rating, and estimate how many hours per day you run it. This power consumption calculation gives you the real numbers needed for tiny house power management decisions.
Calculating Your Daily Power Consumption
Start by creating a complete inventory of your appliances and devices. Walk through your tiny home and write down each item with its wattage rating. You can find this information on device labels or in instruction manuals.
Here’s how to do the math:
- Write down the wattage for each appliance
- Estimate hours used per day
- Multiply watts by hours to get watt-hours daily
- Add all watt-hours together for your total
Example: An LED light using 10 watts for 5 hours daily equals 50 watt-hours. A laptop at 50 watts for 8 hours equals 400 watt-hours. A refrigerator at 600 watts for 8 hours equals 4,800 watt-hours.
| Appliance | Wattage | Hours Per Day | Daily Watt-Hours |
|---|---|---|---|
| LED Lighting | 10 | 5 | 50 |
| Laptop Computer | 50 | 8 | 400 |
| Refrigerator | 600 | 8 | 4,800 |
| Water Pump | 370 | 2 | 740 |
| Space Heater | 1,500 | 4 | 6,000 |
| Microwave | 1,000 | 0.5 | 500 |
Seasonal Variations in Energy Demand
Your energy needs change dramatically across the year. Winter brings longer nights and less sunlight, cutting solar production while heating demands spike. Summer reverses this pattern with more daylight but higher cooling needs.
Smart tiny house power management means planning for the worst season. If you live somewhere with harsh winters, size your system to handle December’s demands, not June’s.
Consider these seasonal factors:
- Winter heating requirements increase electrical load significantly
- Summer cooling may require extra power for fans or air conditioning
- Solar production drops 50-70% during winter months
- Spring and fall offer moderate, predictable consumption patterns
Balancing Comfort and Efficiency
Living small doesn’t mean living uncomfortable. The key is making smart choices about which loads you power electrically and which you don’t. Energy efficiency tips include using propane for heating and cooking, which reduces your electrical demands dramatically.
Choose appliances with Energy Star certification. An Energy Star refrigerator uses about 25% less power than standard models. LED bulbs use 75% less electricity than incandescent lights. These choices compound into serious savings.
“The cheapest electricity is the electricity you don’t use.”
Improve your insulation, install thermal curtains, and seal air leaks. Proper insulation reduces heating and cooling needs by 20-40%. This approach to tiny house power management means you need less equipment and spend less on batteries and generators.
By understanding your actual power consumption, planning for seasonal changes, and choosing efficiency first, you create a realistic foundation for your renewable energy project. This honest assessment prevents the frustration of systems that can’t meet your needs or the waste of oversized, expensive equipment.
Solar Power Solutions for Mobile Dwellings
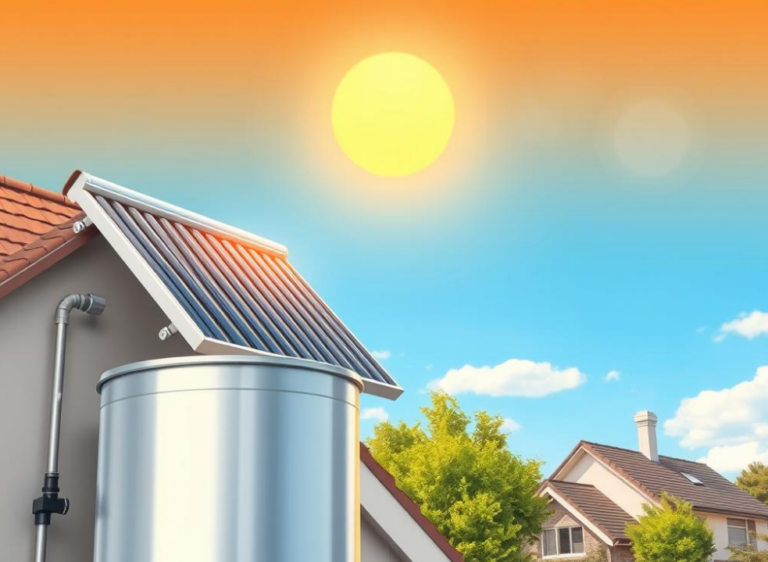
Solar power stands as the most practical renewable energy choice for tiny homes and mobile living spaces. The technology works well for mobile applications because solar panels are lightweight, modular, and come with no moving parts that need maintenance during travel. As costs continue to drop, cost-effective solar solutions have become accessible to more homeowners looking to reduce their energy bills.
A complete DIY solar installation requires understanding how different components work together. Your system needs photovoltaic panels to capture sunlight, mounting hardware to secure them safely, charge controllers to manage power flow, battery storage for nighttime use, and inverters to convert stored energy into usable electricity for your appliances.
Choosing the Right Solar Panel Type
Three main panel types exist for mobile home energy systems, each with different benefits:
- Monocrystalline panels offer the highest efficiency rates between 18-22%, making them ideal when roof space is limited
- Polycrystalline panels cost less but deliver 15-17% efficiency, providing good value for budget-conscious installations
- Thin-film panels work best on curved surfaces common in RVs, though they need more space for the same power output
Sizing Your Solar Array
Use your daily power consumption from the previous section to calculate how many watts you need. A typical small home using 20 kilowatt-hours daily in a sunny region needs about 6,000 watts of solar capacity. Account for 25-30% efficiency losses from dust, temperature, and aging when making your final calculations.
Mobile-Specific Installation Features
Mobile dwellings need special mounting considerations. Flexible panels bend slightly without cracking, reducing damage during road travel. Tiltable mounts let you adjust panel angles with the seasons to maximize production. Portable panels can be repositioned throughout the day for optimal sun exposure, making them perfect for cost-effective solar solutions that adapt to changing locations.
| Solar Panel Type | Efficiency Rating | Best For | Price Range per Watt | Durability in Mobile Use |
|---|---|---|---|---|
| Monocrystalline | 18-22% | Limited roof space | $0.80-$1.00 | Excellent |
| Polycrystalline | 15-17% | Budget installations | $0.60-$0.80 | Very Good |
| Thin-Film | 10-13% | Curved surfaces | $0.50-$0.70 | Good |
Positioning and Orientation
In the Northern Hemisphere, south-facing panels capture the most sunlight year-round. Your panels should tilt at an angle matching your latitude for peak winter performance. Even partial shading from trees, antennas, or other structures reduces output significantly, so plan panel placement carefully before your DIY solar installation begins.
Mobile home energy systems perform best when you combine proper panel selection with smart mounting strategies. Whether you choose fixed installations or flexible, repositionable setups, quality panels and careful sizing ensure reliable power for years of off-grid living.
Building Your Own Wind Turbine System
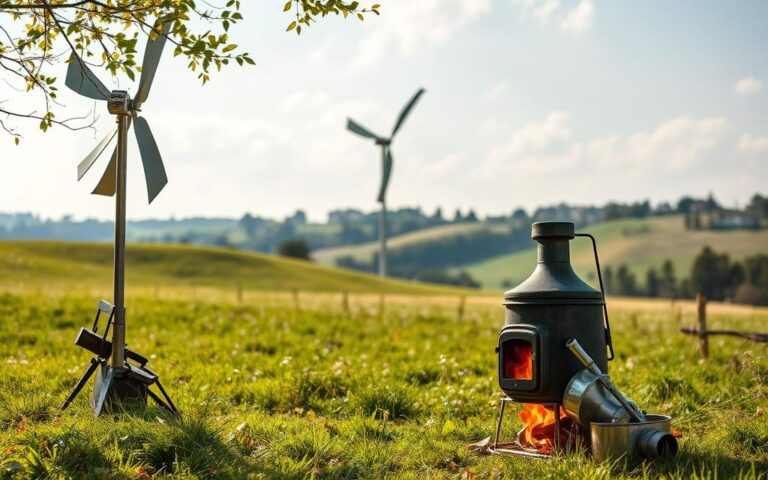
Wind energy offers a powerful complement to solar power for tiny homes and mobile living spaces. Unlike solar panels that depend on daylight, portable wind turbines generate electricity during nighttime hours and cloudy days. Wind turbines convert the kinetic energy of moving air into electrical power through rotating blades. This makes wind turbine installation an excellent choice for locations with consistent breezes or for those who live in regions with seasonal wind patterns. DIY energy projects that combine wind and solar resources create more reliable power systems for off-grid living.
The basic principle behind wind power is simple yet effective. As wind pushes against the turbine blades, it causes them to spin. This rotation powers a generator inside the turbine housing, which produces electricity. Small-scale portable wind turbines designed for residential use typically range from 400 to 1,000 watts in capacity, making them suitable for compact living situations.
Choosing the Right Turbine Size
Selecting the correct turbine size depends on your location’s average wind speeds. The National Renewable Energy Laboratory provides wind maps that show average wind resources across the United States. Areas with annual average wind speeds of 10 miles per hour or higher work best for residential wind turbine installation.
Two main turbine designs exist for DIY energy projects:
- Horizontal-axis turbines – Traditional propeller-style units that face the wind and require more tower height
- Vertical-axis turbines – Egg-beater or Savonius designs that work well for mobile structures since they capture wind from any direction and have lower profiles
Rotor diameter directly affects power output. A larger blade diameter captures more wind energy. Most small turbines for tiny homes feature rotor diameters between 6 and 12 feet. Be realistic about power expectations—a 1,000-watt turbine in average wind conditions produces roughly 1,000 to 1,500 kilowatt-hours annually, depending on wind patterns.
Installation Considerations for Mobile Structures
Wind turbine installation on mobile homes and RVs presents unique challenges. Your structure must support the turbine’s weight and the forces from rotating blades and wind pressure.
Key installation factors include:
- Tower height – Turbines need placement 30 feet or higher to access wind above ground-level turbulence
- Mounting systems – Use tilt-down or removable towers that allow the turbine to come down when traveling
- Guy-wire anchoring – Secure cables distribute stress and prevent structural damage
- Vibration dampening – Rubber mounts reduce noise and movement
- Grounding – Proper electrical grounding protects against lightning strikes
- Safety shutdown mechanisms – Automatic braking systems engage during dangerously high winds
Check local zoning regulations before installation. Many areas restrict tower heights or have noise ordinances affecting wind turbine installation. Verify setback requirements from property lines and obtain necessary permits.
Regular maintenance access is essential for portable wind turbines. Plan installation locations that allow safe inspection and blade cleaning without excessive effort.
Portable Hydroelectric Generators for Off-Grid Living
Portable hydroelectric power stands out as one of the most efficient renewable energy for tiny houses, especially for those built near flowing water sources. Unlike solar panels that depend on sunny days or wind turbines that need consistent breezes, micro-hydroelectric systems generate electricity 24/7. This makes portable hydroelectric power ideal for off-grid living in rural areas.
The power output from your system depends on three key factors:
- Flow rate measured in gallons per minute
- Head height, which is the vertical drop in feet
- Turbine efficiency rating
Even small streams can produce surprising amounts of energy. A modest stream with just 50 gallons per minute flowing down a 20-foot drop can power essential appliances in your tiny home. The formula is simple: Power (watts) equals flow rate times head height times 0.11. This straightforward calculation helps you determine if portable hydroelectric power works for your location.
| Turbine Type | Best For | Head Range |
|---|---|---|
| Pelton Wheel | High-head, low-flow streams | 200+ feet |
| Turgo Turbine | Medium-head applications | 50-200 feet |
| Propeller Turbine | Low-head, high-flow water | 5-50 feet |
Installation involves designing proper intake screening to prevent debris damage, selecting appropriate penstock pipe sizing, and positioning your turbine for maximum efficiency. Your off-grid battery systems work seamlessly with hydroelectric output, storing continuous power generation for later use. This pairing creates stable renewable energy for tiny houses that never depends on weather conditions.
“Micro-hydro systems often deliver capacity factors between 40-80 percent, far outperforming solar installations in most regions.”
Water rights and environmental permits are important considerations before installation. Check local regulations to ensure you maintain minimal ecological impact while building your portable hydroelectric power system. Proper tailrace design returns water safely to the stream without disruption to local ecosystems.
Tiny Home DIY Renewable Energy Storage Options
Storing energy is the backbone of any off-grid solar power system. When your tiny home or mobile dwelling generates excess power during sunny or windy periods, you need a place to save it. This stored energy powers your home at night and during cloudy days. Without proper energy storage options, you cannot take full advantage of renewable energy sources. Battery storage solutions give you independence from the grid and peace of mind.
Your battery system acts as a backup power source. It lets you run appliances that need more power than your solar panels or wind turbines produce at any moment. Think of it like a savings account for electricity. You save power when production is high and withdraw it when production is low.
Battery Bank Configuration and Sizing
Sizing your battery bank correctly is critical. First, calculate your daily energy consumption in kilowatt-hours. Next, decide how many days of backup power you want. Most experts recommend three to five days of autonomy for off-grid living. Multiply your daily use by your desired backup days to find your total capacity needs.
Your system voltage matters too. Common options include 12 volts, 24 volts, or 48 volts. Higher voltages work better for larger systems. You can connect batteries in series to increase voltage or in parallel to increase capacity. Always use matched batteries that are the same age, type, and capacity.
- Calculate total watt-hours needed per day
- Multiply by your days of autonomy desired
- Account for depth of discharge limits
- Choose your system voltage
- Use appropriately sized cables and fuses
- Install proper monitoring equipment
Depth of discharge is how much of your battery’s capacity you actually use. Lead-acid batteries typically allow 50% discharge, while lithium battery banks permit 80% to 100% discharge. This affects your real usable capacity.
Lithium vs Lead-Acid Battery Systems
Two main battery chemistries dominate off-grid systems: lead-acid and lithium. Understanding the differences helps you choose the best energy storage options for your needs.
| Feature | Lead-Acid Batteries | Lithium Iron Phosphate |
|---|---|---|
| Initial Cost | Lower upfront price | Higher initial investment |
| Lifespan | 3-7 years typically | 10-15 years or more |
| Depth of Discharge | 50% recommended | 80-100% usable |
| Maintenance | Regular required | Minimal needed |
| Weight | Heavy for mobile homes | Lighter weight option |
| Temperature Range | Limited tolerance | Better performance |
| Efficiency | 85-90% efficient | 95%+ efficient |
Lead-acid batteries come in three types. Flooded lead-acid batteries are the cheapest option but need ventilation and regular water top-ups. Sealed AGM and gel batteries require no maintenance and work well in mobile applications. Sealed batteries cost more than flooded types.
Lithium iron phosphate batteries offer superior performance for tiny homes. These lithium battery banks weigh significantly less, crucial for RVs and mobile dwellings. They charge faster and allow much deeper discharge levels. Most lithium banks include built-in management systems for safety.
Total cost of ownership favors lithium for long-term use. Although lithium battery banks cost more initially, they last twice as long as lead-acid. You replace lead-acid batteries more frequently, adding replacement costs over ten years. Temperature tolerance also matters. Lithium performs better in extreme hot and cold conditions common in mobile living.
Choose lithium batteries if you value lightweight design, minimal maintenance, and maximum usable capacity. Select lead-acid batteries if initial cost matters most. For off-grid solar power systems in tiny homes, most users find lithium worth the extra investment.
Installing Solar Panels on RVs and Tiny Houses
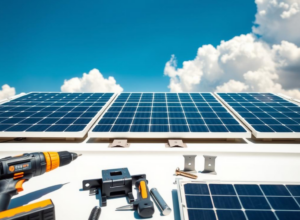
Installing RV solar panels requires careful planning and attention to detail. Before you begin your DIY solar installation, assess your roof space and identify the best locations for panel placement. Check for obstacles like air conditioning units, vents, and antennas that could cast shadows on your panels. These shadows reduce energy production and hurt your mobile renewable energy system’s performance. Leave room for future expansion by planning conduit access points during your initial setup.
Understanding your roof type is essential for choosing the right mounting method. Different installation approaches work best for different surfaces:
- Adhesive mounting using Dicor or 3M VHB tape for rubber or fiberglass RV roofs
- Z-bracket systems with proper sealant for metal or shingled roofs
- Tiltable mounts that allow seasonal angle adjustments
- Ground-deploy portable systems for flexible placement
Solar panel wiring demands precision and safety awareness. Use MC4 connectors for reliable weatherproof connections. Size your wires based on amperage and run length to minimize voltage drop. Configure panels in series or parallel arrangements to achieve your desired system voltage and current.
Safety matters most during installation. Work at heights carefully and ensure proper grounding. Disconnect batteries before working on electrical systems. Follow National Electrical Code guidelines even for mobile applications. Secure all connections against vibration during travel. Weatherproof wire entry points using cable glands or roof penetration fittings. Proper strain relief prevents damage to your mobile renewable energy system during movement.
After installation, test your complete solar panel wiring setup before connecting to batteries. Inspect all connections regularly throughout the year.
DIY Charge Controllers and Power Management Systems
A charge controller sits at the heart of your tiny house power management system. This device regulates power flowing from your solar panels, wind turbines, or other generation sources to your battery bank. Without a proper charge controller installation, your batteries face serious damage from overcharging. The controller ensures your batteries receive the right amount of current at the right time, extending their lifespan and protecting your entire DIY energy projects investment.
Charge controllers work by monitoring battery voltage and adjusting the charging current automatically. As your batteries fill up, the controller gradually reduces the power flowing into them. This prevents dangerous overcharging that destroys battery cells. A quality charge controller also protects against reverse current, which happens at night when your panels produce no power.
MPPT vs PWM Controllers
Two main types of charge controllers exist for DIY energy projects: Pulse Width Modulation (PWM) and Maximum Power Point Tracking (MPPT) controllers. Understanding the differences helps you choose the right system for your needs.
PWM controllers represent the simpler, more affordable option. They work by rapidly turning the charging circuit on and off, controlling how much power reaches your battery. PWM controllers work best when your solar panel voltage matches your battery voltage closely. They suit smaller systems with limited budgets.
MPPT controllers offer more advanced technology. These controllers continuously scan your solar panels to find the exact point where they produce maximum power. MPPT technology captures 20-30 percent more energy from your panels, especially in cold weather or when panel voltage exceeds battery voltage. This extra efficiency often pays for the higher cost over time.
| Feature | PWM Controllers | MPPT Controllers |
|---|---|---|
| Initial Cost | $100-$300 | $300-$1,000 |
| Efficiency Rating | 70-80% | 92-98% |
| Energy Harvest Advantage | Baseline | 20-30% more |
| Best for Panel Voltage | Matches battery voltage | Higher than battery voltage |
| Ideal System Size | Small systems under 400W | Medium to large systems |
| Temperature Performance | Moderate | Excellent in cold weather |
For tiny house power management, MPPT controllers make sense if your system exceeds 400 watts. The extra energy harvest justifies the investment. Smaller systems may find PWM controllers sufficient.
Wiring Your Energy System Safely
Proper charge controller installation requires careful electrical work. Safety mistakes can cause fires, shocks, or equipment damage. Follow these steps for safe wiring.
Start by drawing a complete system wiring diagram before you touch any wires. This diagram shows how everything connects: solar panels to controller, controller to battery bank, battery bank to inverter, and all ground connections. A clear plan prevents costly mistakes.
Wire gauge selection matters greatly. Undersized wires generate dangerous heat and lose power. Use a voltage drop calculator to determine the right wire size for your specific distances and currents. Most systems aim for less than 3 percent voltage drop.
Follow standard color coding for DC electrical systems:
- Red wire for positive connections
- Black wire for negative connections
- Green or bare copper for ground wires
Install fuses or circuit breakers at critical points. Every place where your wire gauge decreases or where a circuit branches requires protection. This prevents overcurrent damage. Fuse ratings should match your wire gauge, not your system voltage.
Use busbar systems to organize your connections. Busbars provide multiple connection points in one clean location. This keeps your electrical installation neat and safe. Properly crimped terminals ensure solid connections that resist corrosion.
Grounding your system prevents electric shock hazards. Connect a ground wire from your charge controller’s negative terminal to a metal grounding rod driven into the earth. This creates a safe path for stray electricity.
Consider adding monitoring displays to your tiny house power management setup. These devices show battery state of charge, energy production, and power consumption in real time. Real-time monitoring helps you understand your system’s performance and avoid overloading your batteries.
Micro-Inverter Systems for Small Space Applications
Micro-inverter systems represent a smart choice for renewable energy for tiny houses and mobile home energy systems. These devices convert direct current (DC) power from your solar panels into alternating current (AC) power that runs your household appliances. Understanding how inverters work helps you build a reliable energy system for compact living spaces.
Most appliances in your home require AC electricity. Your solar panels and batteries produce DC power. An inverter bridges this gap by changing DC electricity into AC electricity. This conversion is essential for using standard household devices in off-grid tiny homes and mobile dwellings.
- Modified sine wave inverters cost less money but can damage sensitive electronics and certain appliances
- Pure sine wave inverters produce clean power identical to grid electricity and work with all devices
Micro-inverter systems attach directly to individual solar panels and convert power at the panel level. This design eliminates long DC wiring runs and reduces shading losses. These systems work well for renewable energy for tiny houses where space is limited and system expansion matters.
Sizing your inverter correctly ensures smooth operation. Your inverter must handle continuous power needs plus surge requirements when motors start. Most applications need capacity 25 to 50 percent above your normal continuous load.
Proper installation of micro-inverter systems improves performance. Place your inverter near batteries to minimize voltage drop. Ensure good ventilation since inverters generate heat during operation. Wire everything correctly using proper gauge sizes for high DC currents flowing through mobile home energy systems.
Battery drain matters too. Inverters use small amounts of power even when idle. Using multiple inverters for different load sizes or automatic sleep modes reduces this parasitic draw on mobile home energy systems.
Combining Multiple Renewable Energy Sources
Creating true energy independence for tiny homes and mobile living requires thinking beyond a single renewable source. A hybrid power system brings together different renewable technologies to work as a unified energy solution. Solar panels produce peak power during daylight hours, particularly in summer months. Wind turbines generate electricity when breezes blow, often producing more energy during winter evenings. When you combine these sources with other renewable options, your tiny home or RV gains reliability that no single system can provide alone.
The beauty of hybrid power systems lies in their complementary nature. While solar energy drops at sunset, wind turbines may be spinning efficiently. When winter clouds block the sun, stronger seasonal winds take over the energy production burden. This balanced approach reduces your dependence on battery storage and minimizes the need for backup generators, making sustainable living more practical and affordable.
Creating a Hybrid Power System
Building an effective hybrid power system starts with understanding your location’s resources and your power consumption calculation needs. Different regions offer different renewable advantages. Coastal areas enjoy strong winds. Sunny regions maximize solar potential. Places with flowing water can tap hydroelectric resources.
Begin by evaluating which renewable sources work best for your situation:
- Solar-primary systems with small wind turbines for winter backup
- Solar-wind-generator combinations for maximum reliability
- Solar-hydro setups in locations near water sources
- Three-source systems combining solar, wind, and micro-hydroelectric power
Your charge controller selection matters significantly. Advanced MPPT (Maximum Power Point Tracking) controllers can accept inputs from multiple sources simultaneously. This means one controller manages power from both solar panels and wind turbines, simplifying your system design and reducing costs.
Voltage matching is essential for hybrid systems. All renewable sources must charge your battery bank at compatible voltages. A 48-volt battery bank, for example, requires all sources to output 48-volt power. Mismatched voltages damage equipment and create safety hazards.
Component sizing prevents one source from overwhelming your system. If your wind turbine produces far more power than your solar array, you create charging imbalances. Proper sizing ensures each source contributes proportionally to your overall energy production.
Automatic Switching and Load Management
Modern hybrid systems go beyond simple manual switching. Intelligent power management keeps your tiny home running efficiently without constant monitoring. These systems automatically optimize energy flow based on what’s available and what you need.
Smart hybrid systems use several key strategies:
- Priority-based charging directs the most efficient or abundant energy source to charge batteries first
- Automatic load shedding disconnects non-essential appliances when battery levels drop below safety thresholds
- Programmable timers run high-draw devices during peak production hours
- Battery management systems adjust charging profiles based on available sources
Control options range from simple to sophisticated. Basic systems use manual switches and monitoring displays. Mid-range solutions employ programmable logic controllers that you configure once and forget. Advanced smart home integration automates decisions based on real-time production data, storage levels, and your consumption patterns.
Load management protects your batteries and extends their lifespan. Your system can automatically shift heavy loads like water heating or laundry to times when solar production peaks or wind power surges. This intelligent scheduling reduces battery strain and improves overall system efficiency for sustainable living.
A well-designed hybrid power system transforms your tiny home into an energy-independent sanctuary. You gain reliability, reduce backup generator use, and achieve the resilient power supply that mobile living demands.
Maintaining Your Mobile Renewable Energy Setup
Keeping your mobile renewable energy system running smoothly requires regular attention and care. Unlike traditional generators, off-grid solar power systems need minimal upkeep, but neglecting maintenance can cause small problems to become expensive repairs. A consistent maintenance routine protects your investment and ensures reliable power supply wherever you travel.
Solar panels rank among the easiest renewable energy maintenance tasks. Dust, pollen, bird droppings, and debris can reduce output by 20 percent or more. Clean your panels every few months using soft brushes and distilled water. Avoid harsh chemicals or abrasive materials that scratch the surface. After storms or travel, inspect mounting hardware for looseness or corrosion. Check all wire connections for tightness and signs of overheating.
Battery maintenance differs based on your energy storage type. Flooded lead-acid batteries need regular water level checks and periodic equalization charges. Sealed and lithium batteries require voltage checks and terminal cleaning only. Monitor your system’s performance using a multimeter to catch voltage problems early.
For mobile renewable energy systems, pre-travel inspections matter greatly. Secure all components before moving. Check for vibration damage after traveling. In cold climates, winterize your setup to prevent water freezing in hydroelectric systems.
Essential Maintenance Checklist
- Clean solar panels monthly
- Inspect mounting hardware quarterly
- Check battery water levels and terminals monthly
- Test system voltage weekly
- Secure all components before travel
- Inspect wiring for damage after storms
Energy efficiency tips include monitoring your system logs to spot degradation patterns. Listen for unusual noises in wind turbines indicating bearing wear. Keep performance records to establish baselines. When issues appear beyond your skills, consult professionals rather than risk system damage.
Cost Analysis and Return on Investment
Understanding the financial side of DIY energy projects helps you make smart decisions about your renewable energy setup. The initial investment in cost-effective solar solutions and battery storage solutions varies based on system size and quality. Most people find that DIY approaches cost significantly less than hiring professionals to install their systems.
Component costs break down into several categories. Solar panels typically range from $0.50 to $1.50 per watt. Charge controllers start around $150 for basic models and reach $600 for advanced options. Battery storage solutions include lead-acid batteries at $100 to $200 per kilowatt-hour and lithium options at $400 to $800 per kilowatt-hour. Inverters cost between $200 and $2,000 depending on capacity. Mounting hardware and wiring add another $300 to $1,000 to your total.
| System Size | Typical Cost Range | Best For |
|---|---|---|
| 400-watt Basic Setup | $1,500 – $2,500 | Weekend getaways and light use |
| 1,000-watt Mid-Size System | $4,000 – $7,000 | Full-time tiny home living |
| 2,000-watt Hybrid System | $8,000 – $15,000 | Comprehensive energy independence |
DIY installation cuts costs dramatically compared to professional services. You can save 40 to 60 percent by handling installation yourself. This approach requires time and learning, yet the financial benefits make it worthwhile for most homeowners.
Return on investment calculations look different for mobile and tiny home living. Instead of comparing against grid electricity rates, consider what you currently spend:
- RV park electrical hookups: $20 to $50 nightly ($600 to $1,500 monthly)
- Generator fuel costs: $5 to $10 daily ($150 to $300 monthly)
- Camping in remote locations: Free with energy independence
Most systems pay for themselves within 2 to 5 years when replacing campground fees. After payback, you enjoy years of free energy and reduced dependence on external power sources. Energy independence brings benefits beyond finances, including environmental impact and peace of mind.
Federal incentives boost your savings. The Investment Tax Credit covers 30 percent of solar installation costs. State and local programs vary by location, so check what’s available in your area. Many financial institutions offer loans designed specifically for renewable energy projects.
Start small if your budget is limited. Begin with a basic system and expand as your experience grows and funds become available. This phased approach makes renewable energy accessible to everyone interested in DIY energy projects for their mobile or tiny home setup.
Conclusion
Building your own tiny home DIY renewable energy system is more achievable today than ever before. Equipment costs have dropped significantly. Technology has become more user-friendly. Online resources and communities offer endless support. Anyone interested in sustainable living can start this journey with confidence.
The path to energy independence begins with understanding your actual power needs. From there, you choose between off-grid solar power, wind turbines, hydroelectric generators, or hybrid systems that match your location. You select battery storage that fits your budget and performance requirements. You install everything safely and maintain it properly. Each decision builds on the last one, creating a system tailored to your specific situation.
You don’t need to install everything at once. Start with a basic off-grid solar power setup. Add more components over time. Learn from real-world experience. Adjust your system as you discover what works best for your lifestyle. This approach spreads costs across months or years. It also gives you time to develop skills and confidence. Join online communities and local workshops. Connect with others who have built similar systems. Their experiences help you avoid mistakes and accelerate your learning.
Don’t let doubt stop you from starting. Basic renewable energy systems are within reach for anyone comfortable using hand tools and willing to learn. Mistakes happen, but they’re rarely catastrophic when you follow safety practices. The independence you gain from generating your own power delivers rewards beyond money saved. That satisfaction aligns perfectly with the values driving tiny home and mobile living: sustainability, self-reliance, financial freedom, and environmental responsibility. Your first step might be an energy audit, purchasing your first solar panel, or simply continuing to research. Whatever you choose, remember that every journey toward energy independence starts with the decision to begin.
FAQ
What is the average cost of a DIY solar panel system for a tiny home?
The cost varies based on system size and quality of components. A basic 400-watt solar setup with a small battery bank typically costs $1,500-$2,500, while a mid-size 1,000-watt system suitable for full-time tiny home living ranges from $4,000-$7,000. A comprehensive 2,000-watt hybrid system combining multiple renewable sources may cost $8,000-$15,000. Solar panels themselves cost approximately $0.50-$1.50 per watt, charge controllers range from $150-$600, battery banks cost $100-$200 per kWh for lead-acid or $400-$800 per kWh for lithium options, and inverters range from $200-$2,000 depending on capacity.
How do I calculate my tiny home’s daily power consumption?
Start by creating an energy audit by listing all appliances and devices you use, noting their wattage ratings from product labels or manuals. Estimate how many hours per day you use each device, then multiply the wattage by hours of use to get watt-hours consumed daily. For example, an LED light rated at 10 watts used 8 hours daily equals 80 watt-hours. Add watt-hours for all devices to get your total daily consumption. Common tiny home appliances to include are LED lights, laptops, refrigerators, water pumps, and heating or cooling devices. This calculation prevents both under-sizing your system (causing power shortages) and over-sizing (wasting money on unnecessary capacity).
What’s the difference between monocrystalline and polycrystalline solar panels?
Monocrystalline panels are made from a single crystal of silicon, offering higher efficiency ratings (typically 15-22%) and better performance in low-light conditions, making them ideal when space is limited. Polycrystalline panels are manufactured from multiple silicon crystals, providing slightly lower efficiency (12-18%) but at a more affordable price point. Thin-film panels offer the lowest cost and best performance in high-temperature conditions but require more space due to lower efficiency. For mobile dwellings with limited roof space, monocrystalline panels’ superior efficiency makes them the better choice despite higher upfront costs, though your budget and available space should guide your final decision.
Can I run a full-time tiny home completely off renewable energy?
Yes, you can run a full-time tiny home on renewable energy with proper system design and sizing. Success requires accurately calculating your daily power consumption, choosing appropriately sized generation capacity for your location’s resources, installing sufficient battery storage for nighttime and low-production periods, and making strategic energy choices like using propane for heating and cooking to reduce electrical demand. Most successful systems combine multiple renewable sources (solar, wind, and/or hydroelectric) to ensure year-round reliability. A mid-size 1,000-watt system with adequate battery backup can comfortably support full-time off-grid living when paired with energy-efficient appliances and conservation practices.
What are the advantages of lithium batteries over lead-acid for mobile applications?
Lithium iron phosphate (LiFePO4) batteries offer several advantages for tiny homes and mobile living despite their higher upfront cost of $400-$800 per kWh versus $100-$200 per kWh for lead-acid. Lithium batteries provide 10-15 year lifespans (significantly longer than lead-acid), allow deeper discharge cycles without damage (typically 80-90% depth of discharge versus 50% for lead-acid), weigh substantially less (critical for mobile applications), charge more efficiently, and require no maintenance. While initial costs are higher, the total cost of ownership over their lifespan often proves more economical than replacing lead-acid batteries multiple times. Additionally, lithium’s lighter weight is particularly valuable for RVs and mobile dwellings where every pound matters for fuel efficiency and structural load considerations.
How do MPPT and PWM charge controllers differ in performance?
Pulse Width Modulation (PWM) controllers are simpler, less expensive devices that work best when solar panel voltage closely matches your battery voltage. They regulate charging by gradually reducing current as batteries approach full charge. Maximum Power Point Tracking (MPPT) controllers are more sophisticated, continuously adjusting to extract maximum power from your solar panels regardless of voltage differences, delivering 20-30% more energy harvest especially in cold weather or when panel voltage significantly exceeds battery voltage. MPPT controllers are worth their additional cost ($200-$400 premium) for larger systems, though PWM controllers suffice for small, basic setups. For most mid-size tiny home systems, MPPT technology provides superior performance and faster system payback despite higher initial investment.
What maintenance does a solar panel system require?
Solar panels require regular but minimal maintenance. Clean panels every 1-3 months by removing dust, pollen, bird droppings, and debris that can reduce output by 20-25%, using soft brushes and distilled water or approved cleaning solutions that won’t scratch the surface. Inspect mounting hardware quarterly for looseness or corrosion, particularly after travel or severe weather. Check all wire connections for tightness and signs of overheating or corrosion, and monitor system performance to identify degradation or failures early. For mobile installations, perform pre-travel inspections to ensure panels are securely fastened and won’t shift during movement, and conduct post-travel checks for vibration damage. Most modern solar panels require no other maintenance and can operate reliably for 25-30 years with these simple practices.
Is it possible to expand a small renewable energy system over time?
Absolutely. Phased implementation is an excellent strategy for building renewable energy systems within budget constraints. Start with a basic solar setup (400-600 watts) and small battery bank, allowing you to learn system operation and identify your actual energy needs. After establishing baseline usage patterns, expand by adding more solar panels, installing additional batteries, or incorporating complementary renewable sources like small wind turbines or hydroelectric systems. This approach spreads costs over time, lets you validate component reliability before larger investments, and allows refinement based on real-world experience. Many successful off-grid users started with modest systems and expanded them significantly over 2-3 years as budget allowed and confidence grew.
What are the best locations for wind turbines on tiny homes and RVs?
Wind turbines require placement where they access consistent wind above ground turbulence, typically at least 20-30 feet above surrounding obstacles for optimal performance. For RVs and mobile tiny homes, roof mounting is common but requires structural assessment to ensure the roof can handle wind loads and vibration. Vertical-axis turbines are often preferable to horizontal-axis designs because they have lower profiles, capture wind from any direction, and reduce aerodynamic drag during travel. Tilt-down or removable mounting systems are essential for travel, allowing you to lower or remove the turbine before moving. Check local zoning regulations before installation, as many jurisdictions restrict tower height. Ground-deploy portable systems offer an alternative for temporary installations where permanent mounting isn’t feasible.
How do I know if my location is suitable for micro-hydroelectric power?
Hydroelectric potential depends on two key factors: water flow rate (measured in gallons per minute) and vertical drop or head (measured in feet). Even small streams can generate substantial power if they have reasonable flow and drop. Calculate potential power output using the formula: Power (watts) = (Head in feet × Flow in GPM × 0.1) ÷ Efficiency factor. A stream with just 10 feet of head and 50 GPM flow can produce approximately 50 watts continuously, rivaling daily solar output from larger panels. Use USGS topographic maps to estimate head, measure flow using the bucket method, and research water rights regulations in your area. Micro-hydroelectric systems provide 24/7 generation capability with high capacity factors, making them exceptionally valuable for off-grid tiny homes when water resources are available.
What safety precautions are essential when installing solar panels myself?
Safety should be your primary concern during any DIY solar installation. Always disconnect batteries before working on electrical systems to prevent shocks or sparks. Use proper fall protection equipment when working at heights, including harnesses and safety lines. Follow National Electrical Code guidelines for wire sizing, use properly rated fuses and circuit breakers at every connection point, and ensure the entire system is properly grounded to prevent shock hazards and equipment damage. Install disconnects between your solar panels and charge controller, between batteries and inverter, and on AC output from the inverter. Wear appropriate personal protective equipment, use tools properly, and never work on electrical systems in wet conditions. When in doubt about safety requirements, consult the National Electrical Code or hire a licensed electrician to review your installation before energizing the system.
Can I use standard household appliances with an off-grid renewable energy system?
Yes, most household appliances can work with off-grid systems if you properly size your inverter and have adequate battery capacity. Pure sine wave inverters convert DC battery power to AC electricity identical to grid power, making them compatible with all appliances including sensitive electronics, variable-speed motors, and medical devices. Modified sine wave inverters are cheaper but may cause problems with certain devices. Size your inverter to handle both continuous power draw and surge requirements when motors and compressors start (typically 25-50% above continuous loads). Energy-efficient appliances with Energy Star ratings reduce overall system size requirements and costs. Some tiny home dwellers strategically use propane for heating and cooking to reserve electrical power for lights, computers, and refrigeration, maximizing system efficiency and reducing required battery capacity.
What is the federal Investment Tax Credit for solar energy systems?
The federal Investment Tax Credit (ITC) currently allows you to deduct 30% of your solar installation costs from your federal income taxes. This applies to both grid-tied and off-grid solar systems, making it accessible for tiny home installations. For example, a $5,000 solar system qualifies for a $1,500 tax credit, effectively reducing your net cost to $3,500. The ITC applies to equipment costs including panels, inverters, and balance-of-system components, as well as labor for professional installation. DIY installations also qualify for the credit on equipment costs (though not your labor time). This federal incentive is available through 2032, though it gradually steps down after 2032. Additionally, many states and local jurisdictions offer additional incentives, rebates, or tax credits, so research programs available in your specific location.
How do hybrid renewable energy systems improve reliability?
Hybrid systems combine multiple renewable sources to leverage their complementary nature, dramatically improving year-round reliability. Solar produces peak power during daylight hours, especially strong in summer months. Wind often generates more during winter months and nighttime hours. Hydroelectric systems provide consistent baseload power whenever water flows through the turbine. By combining sources, you reduce reliance on any single resource and minimize required battery capacity since sources balance each other throughout the year. A solar-wind-hydro hybrid system can achieve 95%+ uptime, compared to 70-80% for single-source systems. Hybrid configurations also allow smaller battery banks, reducing weight (critical for mobile applications) and cost while maintaining reliable power. Many off-grid experts recommend solar as primary with wind or hydro as supplementary sources based on location-specific resources.
What is depth of discharge and why does it matter for battery selection?
Depth of discharge (DoD) is the percentage of a battery’s total capacity that you can safely use before recharging. Lead-acid batteries have a DoD of approximately 50%, meaning if you have a 10 kWh battery bank, you can only use 5 kWh before needing to recharge to avoid damage. Lithium iron phosphate batteries typically allow 80-90% DoD, so the same 10 kWh battery bank provides 8-9 kWh of usable capacity. This difference significantly affects required battery bank size and overall system cost. To maintain 5 kWh of usable capacity, you’d need a 10 kWh lead-acid system or only a 6 kWh lithium system. While lithium batteries cost more per kWh upfront, their higher usable capacity and longer lifespan (10-15 years versus 5-8 years for lead-acid) often result in lower total cost of ownership over time.
What does days of autonomy mean in off-grid system design?
Days of autonomy refers to how many days your battery bank can power your home without any renewable energy generation. This accounts for cloudy periods, low wind conditions, or equipment failures where your system receives no charging input. A system with 3 days of autonomy can run your home for 3 days using only stored battery energy. Sizing requires calculating your daily energy consumption and multiplying by your desired autonomy days, then accounting for depth of discharge limitations. For example, if you use 20 kWh daily and want 3 days of autonomy with lead-acid batteries (50% DoD), you need: (20 kWh × 3 days) ÷ 0.5 = 120 kWh total battery capacity. Most off-grid tiny homes use 2-5 days of autonomy depending on location’s reliability and personal risk tolerance. Higher autonomy improves reliability but increases costs significantly, so balance your budget against acceptable risk of occasional generator backup use.
How do I weatherproof solar panel installations on my RV roof?
Weatherproofing is critical for roof-mounted solar installations to prevent water infiltration and leaks. For rubber or fiberglass RV roofs, use adhesive mounting with products like Dicor or 3M VHB tape to minimize roof penetrations. For metal or shingled roofs, Z-bracket mounting systems with proper sealant application create secure attachment points. Any penetrations through the roof require weatherproof treatment using rubber roof sealant, cable glands, or roof penetration fittings. After drilling holes for cables, apply marine-grade sealant around all entry points and allow proper curing time before the system runs. Use cable conduit to protect wiring from UV damage and mechanical wear. Ensure all connections use waterproof MC4 connectors suitable for outdoor exposure. Annually inspect your installation for sealant cracking or separation, resealing as needed. Proper weatherproofing prevents costly water damage to your living space and extends panel system lifespan significantly.
What wire gauges should I use for my DC solar system?
Proper wire sizing prevents voltage drop losses and prevents fire hazards from overheated wiring. Use voltage drop calculators available online, or refer to voltage drop charts from the National Electrical Code. As a general rule, keep DC voltage drop under 3% from panels to batteries and under 2% from batteries to inverter. Wire gauge requirements depend on amperage and distance—higher amperages and longer distances require thicker wire. For example, a 30-amp circuit at 20 feet distance with 48-volt system might require 6 AWG copper wire, while 100 amps at the same distance requires 2/0 AWG. Always use color-coding standards with black or red for positive DC, white or black for negative DC. At connection points where wire gauge changes or branches occur, install properly rated fuses or circuit breakers to protect the smaller gauge wire. Undersized wiring causes voltage drop reducing system efficiency, potential overheating and fire risk, and faster battery discharge, so don’t attempt to save money by using smaller wire than recommended.
What are the seasonal variations I should account for in my energy planning?
Seasonal variations significantly affect renewable energy production and consumption. Winter brings increased heating requirements but reduced solar production due to shorter days, lower sun angles, and frequent cloud cover—solar output can drop 50-70% compared to summer. Wind resources often increase during winter months, making winter a potential strength for wind-heavy hybrid systems. Summer brings increased cooling demands but peak solar production. Northern latitudes experience extreme variations (12+ hour winter darkness versus 16+ hour summer daylight), while southern locations have more consistent year-round production. Plan your system for worst-case scenarios, typically your lowest production season combined with highest consumption season. Calculate minimum monthly generation and size your battery bank and backup power accordingly. Many off-grid residents living in harsh climates maintain backup generators for extended cloudy or calm periods, accepting occasional fuel expenses to right-size renewable systems affordably.
How do I prevent shading issues from reducing solar panel output?
Shading from trees, buildings, vents, air conditioners, or roof features can reduce solar output by 10-50% depending on shadow duration and extent. Plan your panel layout to avoid shadows from fixed obstacles by positioning panels away from roof edges, using a sun path tool to determine seasonal shadow patterns, and avoiding areas shadowed by nearby structures. For mobile installations, consider that